
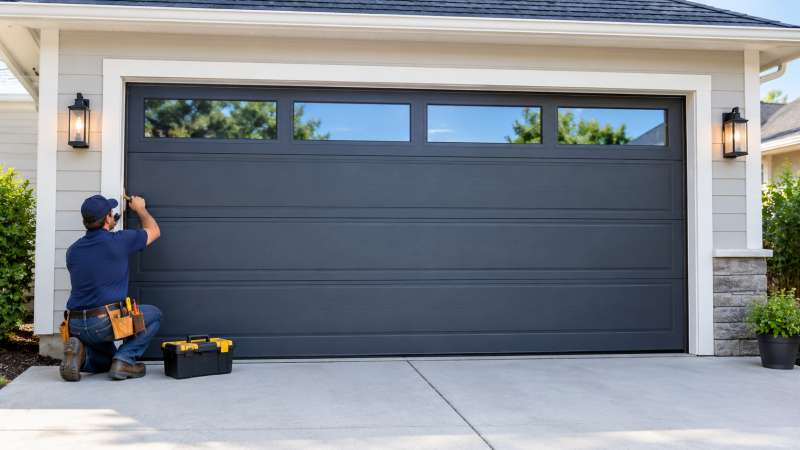
A garage door plays an essential role in protecting your home, securing your belongings, and providing convenient access to your garage. However, regular use can gradually wear down its moving parts, affect its performance, and create safety concerns. Therefore, proper installation, timely repairs, and routine maintenance are necessary to keep the system operating reliably.
Whether you are installing a new door, repairing a damaged mechanism, or maintaining an existing system, understanding the basic requirements can help you make informed decisions. In addition, knowing which tasks you can handle safely and which require professional assistance can prevent unnecessary expenses and serious injuries.
This comprehensive guide explains garage door types, installation considerations, common mechanical problems, safe maintenance practices, repair costs, and professional servicing. By following these recommendations, homeowners can improve reliability, maintain security, and extend the useful life of their garage door.
1. Understanding Different Garage Door Types
Before planning installation or repairs, identify the type of door that best suits your property. Different designs use different mechanisms, and each option has specific space, maintenance, and installation requirements.
Sectional Garage Doors
Sectional doors consist of horizontal panels connected by hinges. When the door opens, rollers guide the panels along vertical tracks before moving them beneath the ceiling.
These doors are common in residential properties because they save driveway space and work well with automatic openers.
Their main advantages include:
- Efficient use of interior and driveway space.
- Compatibility with many automatic opener systems.
- Availability of insulated and non-insulated models.
- A wide selection of colors, finishes, and panel designs.
However, sectional doors require properly aligned tracks, functional rollers, and a correctly balanced spring system.
Roll-Up Garage Doors
Roll-up doors use narrow slats that coil around a drum above the opening. They often suit commercial buildings, workshops, and locations where overhead space is limited.
These systems can provide durable operation when installed and maintained correctly. Nevertheless, the rolling mechanism may require specialized components and professional servicing.
Single-Panel Tilt-Up Doors
Single-panel doors use one large panel that tilts outward and upward as it opens. Their design differs from sectional doors because the panel moves as one piece.
These doors require adequate clearance near the driveway and a suitable lifting mechanism. Because the panel can be heavy, its spring system and supporting hardware must remain in good condition.
Side-Hinged Garage Doors
Side-hinged doors open outward like traditional double doors. They can suit garages where overhead storage space is important or where homeowners prefer a traditional appearance.
However, they require sufficient clearance outside the garage and secure hinges that support the door’s weight.
Understanding your door’s construction will help you select appropriate maintenance procedures and replacement parts.
2. Garage Door Installation: What You Need to Know
Correct installation supports smooth movement, dependable operation, and safe access. Poor installation can cause uneven movement, excessive noise, premature component wear, and problems with automatic safety features.
Therefore, homeowners should plan the installation carefully and use a qualified professional for work involving heavy panels, springs, cables, and lifting mechanisms.
Step 1: Measure the Garage Opening
Begin by measuring the width and height of the opening. Also, measure the available side room, headroom, and backroom.
These measurements determine whether the selected door and operating mechanism will fit properly.
Common residential dimensions include approximately 8 or 9 feet wide by 7 feet high for a single-car opening and 16 feet wide by 7 or 8 feet high for a double-car opening. However, actual requirements vary by property and manufacturer.
Do not order a door based solely on typical dimensions. Have the installer verify the measurements and assess the frame before proceeding.
Step 2: Select a Suitable Door
Choose a door that matches your home’s architecture, budget, climate, and intended use.
For example, steel doors offer a practical combination of durability and design flexibility. Wooden doors provide natural character but may require more maintenance. Insulated models can help regulate temperatures in garages connected to living spaces.
Also, consider the available headroom, opener compatibility, and the frequency of daily use.
Step 3: Inspect and Prepare the Frame
Before installation, the installer should inspect the opening for damaged timber, loose masonry, uneven surfaces, and other structural concerns.
A stable mounting surface helps support the tracks and related hardware. The installer should address any necessary repairs before attaching the new system.
Step 4: Assemble and Position the Panels
For a sectional door, the installer generally begins with the bottom panel and works upward according to the manufacturer’s instructions.
The process includes positioning the weather seal, attaching the specified hinges and brackets, installing rollers, and securing the panels in the correct sequence.
The installer must use the designated mounting points and hardware. Incorrect positioning can affect alignment and create mechanical stress.
Step 5: Install the Tracks and Spring System
The installer positions the vertical and horizontal tracks and checks their alignment. They then install the specified lifting mechanism and spring system.
Springs counterbalance the door’s weight and allow controlled movement. Because they store significant mechanical energy, homeowners should never attempt to install, adjust, or repair them without the appropriate professional training and equipment.
Step 6: Install the Automatic Opener
If the door uses an electric opener, the installer mounts the motor and connects the approved operating mechanism.
The installation must follow the manufacturer’s specifications for door weight, travel limits, electrical connections, and safety features.
Step 7: Test the Completed Installation
Finally, the installer checks the door’s movement, balance, alignment, and travel limits. They should also verify that the remote controls, safety sensors, and automatic reversal features operate correctly.
Ask the installer to demonstrate normal operation and explain the manufacturer’s maintenance recommendations.
3. Essential Garage Door Maintenance Tasks
Routine maintenance helps identify developing problems before they become expensive repairs. It also allows homeowners to monitor the condition of visible components and safety features.
A useful starting point is to perform visual inspections twice a year, preferably during spring and fall, and arrange an annual professional tune-up. Follow the manufacturer’s instructions if they recommend a different schedule.
Inspect the Door and Hardware
Examine accessible areas for damaged panels, corrosion, worn seals, loose fasteners, and unusual gaps.
Pay particular attention to:
- Frayed or visibly damaged lifting cables.
- Cracked or compressed weatherstripping.
- Bent or obstructed tracks.
- Damaged rollers and hinges.
- Loose mounting brackets.
- Unusual changes in movement or noise.
Never touch a damaged cable or spring. If you notice these warning signs, stop operating the door and arrange professional service.
Clean the Panels and Tracks
Dust, mud, leaves, and other debris can affect the appearance and operation of your garage door.
Clean the panels with a suitable product and a soft cloth. Remove loose debris from accessible track areas without dismantling the hardware or disturbing the door’s alignment.
Keep the floor near the opening clear so that debris does not interfere with the bottom seal or safety sensors.
Maintain Weather Seals
Weatherstripping helps limit the entry of water, dust, insects, and outside air.
Inspect the rubber seal along the bottom of the door and the perimeter seals around the frame. Replace cracked, torn, or badly compressed seals with compatible products.
However, if gaps remain after replacing the seals, the door or frame may need professional adjustment.
Lubricate Approved Moving Components
Appropriate lubrication can reduce friction and help certain moving parts operate smoothly.
Use a garage-door lubricant specified by the manufacturer, such as a suitable silicone-based product or white lithium grease where approved.
Apply it sparingly to the designated hinges, roller bearings, and spring components. Avoid coating the inside of tracks unless the manufacturer specifically instructs you to do so, because excess lubricant can attract dirt.
Do not assume every product marketed as a general-purpose lubricant is suitable for every component. Follow the manufacturer’s instructions and avoid contaminating the sensors or electrical equipment.
Check Accessible Fasteners
Repeated movement can gradually loosen some fasteners.
Inspect accessible mounting hardware for obvious looseness or damage. You may tighten a simple loose fastener if the manufacturer permits it and the task does not involve a loaded component.
Do not loosen or adjust brackets connected to springs, lifting cables, or other parts under tension. Ask a technician to handle those components.
4. How to Test Garage Door Safety Features
Safety checks help determine whether the door’s protective systems function as intended. However, homeowners must follow the opener manufacturer’s exact testing procedure.
Test the Photoelectric Sensors
Most modern automatic openers use photoelectric sensors near the bottom of the opening. These sensors create a beam across the door’s path.
First, inspect the sensor lenses for dirt and clean them gently. Then, follow the manufacturer’s instructions to confirm that the sensors remain aligned and that an interruption of the beam prevents the door from closing normally.
Some systems display indicator lights that help identify alignment problems.
If the door continues closing when the beam is interrupted, stop using automatic operation and arrange professional repairs. Never bypass the sensors.
Test the Automatic Reversal System
Many modern openers include a contact-reversal feature designed to respond when a closing door encounters an obstruction.
Follow the manufacturer’s prescribed test, using only the specified test object and method. If the system does not reverse as expected, discontinue automatic operation until a qualified technician inspects it.
Do not place your hands, feet, or any part of your body beneath a moving door.
Check the Door’s Balance
A properly balanced door should move in a controlled manner, but testing the balance involves the spring system and can be dangerous when the door is damaged.
Some manufacturers provide a manual balance test that involves disconnecting the opener and moving the door to a specified position. Perform this test only when the door appears undamaged, the instructions explicitly permit it, and you can follow the procedure safely.
If the door feels unusually heavy, moves suddenly, or will not remain in the specified position, stop immediately and call a technician.
Never attempt to correct an imbalance by adjusting the springs yourself.
5. Common Garage Door Problems and Repairs
Even a properly installed door can develop mechanical or electrical problems. Recognizing the symptoms helps you decide whether to perform a simple maintenance task or request professional assistance.
The Door Will Not Open
Several problems can prevent a door from opening, including a depleted remote battery, a power interruption, a locked door, a faulty opener, or a damaged spring.
Start by checking the remote battery and the opener’s power supply if you can do so safely.
If the motor runs but the door does not move, or the door suddenly feels much heavier than normal, stop operating it. A broken spring or cable may be responsible.
The Door Makes Grinding or Squeaking Sounds
Unusual noises may indicate worn rollers, loose hardware, poor alignment, or insufficient lubrication on approved components.
First, remove visible debris from accessible areas. Then, apply the recommended lubricant to the components specified by the manufacturer.
If the noise continues or originates from the spring assembly, arrange professional inspection.
The Door Closes Unevenly
A crooked door may indicate a damaged roller, track problem, cable failure, or unbalanced lifting mechanism.
Stop using the door if it appears tilted or moves unevenly. Continuing to operate it may worsen the damage or cause the door to fall.
A technician can identify the cause and determine whether the system needs adjustment or replacement parts.
The Door Reverses Unexpectedly
An automatic door may reverse because of obstructed sensors, incorrect travel settings, resistance along the track, or another mechanical problem.
Clean the sensor lenses and remove visible obstructions. If the problem persists, ask a technician to inspect the system.
Do not disable safety features to force the door to close.
The Remote Control Stops Working
A remote may stop working because of a depleted battery, interference, damaged buttons, or a problem with the opener’s receiver.
Replace the battery if necessary and follow the manufacturer’s instructions for testing or reprogramming the remote.
If several controls fail at the same time, the opener or its power supply may require professional inspection.
6. DIY Garage Door Maintenance: What Can You Do Yourself?
Homeowners can handle several low-risk maintenance tasks when the manufacturer permits them.
Cleaning and Basic Sealing
You can usually clean accessible panels, remove loose debris, and replace worn weatherstripping using compatible products.
These tasks help maintain the door’s appearance and reduce drafts or water entry.
Cleaning Sensor Lenses
You can gently wipe dust from the photoelectric sensor lenses using a soft cloth.
If the sensors remain misaligned or the system fails its safety test, contact a technician instead of adjusting electrical connections or bypassing the system.
Lubricating Approved Parts
You may lubricate the components identified in the owner’s manual using the specified product.
Apply only the recommended amount, and keep lubricant away from surfaces where it could cause slipping or interfere with sensor operation.
Tightening Permitted Hardware
Some accessible fasteners can be tightened if the manufacturer allows it and the work does not involve a loaded or tensioned component.
Never adjust spring brackets, lifting cables, cable drums, or other hardware that could release stored energy.
The guiding principle is simple: perform only tasks you can complete safely without dismantling critical mechanical components.
7. Garage Door Repairs That Require a Professional
Some repairs create serious risks because garage doors are heavy and their spring systems store substantial energy.
Spring Replacement and Adjustment
Torsion and extension springs help counterbalance the door’s weight. When a spring breaks or loses its correct tension, the door can become difficult to control.
Do not attempt to adjust, remove, or replace these springs yourself. Incorrect handling can cause severe injury or death.
Contact a qualified garage door technician who has the appropriate tools and training.
Cable and Drum Repairs
Lifting cables and drums help raise and lower the door in a controlled manner.
Frayed cables, loose drums, or improperly wound cables can cause the door to become unstable. These components may remain under tension even when the door appears stationary.
Keep clear of the mechanism and arrange professional repairs.
Major Track Realignment
A bent or misaligned track can cause rollers to bind or the door to move unevenly.
Minor cleaning may be appropriate for homeowners, but significant track straightening, repositioning, or structural adjustments should be handled by a qualified technician.
Motor, Belt, and Electrical Repairs
A faulty motor, damaged belt, or electrical problem may prevent the opener from operating correctly.
Simple checks, such as examining the remote battery or confirming that a power outlet is functioning, may help identify an obvious issue. However, internal electrical repairs, motor replacement, and complex opener servicing require suitable expertise.
Choose a technician who understands your specific opener model and follows the manufacturer’s service procedures.
8. How Much Does Garage Door Repair Cost?
Repair costs vary according to the type of problem, replacement parts, labor rates, door design, and local market conditions.
A broad illustrative estimate for standard professional repairs is approximately $100 to $500 or more in markets where services are priced in US dollars. This is not a universal price list, and actual costs can differ considerably by country and location.
Minor adjustments or sensor servicing may cost less than major mechanical repairs. Spring replacement, cable repairs, opener replacement, and structural work may increase the total.
Before approving a repair, ask the technician for an itemized estimate covering:
- Inspection and diagnostic fees.
- Replacement parts and hardware.
- Labor charges.
- Additional adjustments or structural work.
- Warranty coverage.
- Any follow-up service requirements.
If the door has extensive damage or repeatedly develops mechanical problems, compare the repair estimate with the cost of replacing the complete system.
A detailed quote helps you understand the work involved and avoid unexpected expenses.
9. When Should You Replace Your Garage Door?
Repairing an existing door may be sensible when the problem affects only one replaceable component. However, replacement can offer better long-term value when the door has extensive damage.
Consider replacement if you notice:
- Significant corrosion or structural deterioration.
- Repeated failures despite professional repairs.
- Extensive panel damage.
- Poor insulation that no longer meets your needs.
- Obsolete components that are difficult to obtain.
- Safety features that cannot be restored economically.
A replacement may also make sense if you want a different design, improved insulation, quieter operation, or better compatibility with modern controls.
Ask a qualified installer to assess the existing frame, tracks, opener, and door panels before deciding.
10. Tips for Extending the Life of Your Garage Door
Consistent care can help reduce unnecessary wear and keep the system operating reliably.
Follow the maintenance schedule. Perform routine visual checks twice a year and arrange professional servicing according to the manufacturer’s recommendations.
Keep the area clear. Remove objects that may obstruct the door or its safety sensors.
Respond to unusual sounds. Grinding, banging, or sudden changes in movement may indicate a developing problem.
Protect the exterior finish. Clean the door with suitable products and repair damaged coatings as recommended.
Check weather seals. Replace worn rubber components before gaps allow significant water, dust, or air entry.
Use the door correctly. Avoid forcing a stuck door or repeatedly operating a system that shows signs of mechanical failure.
Arrange professional inspections. A qualified technician can identify wear in springs, cables, rollers, tracks, and opener components that homeowners should not dismantle.
These practices can improve reliability, although the actual service life depends on construction quality, frequency of use, climate, and maintenance history.
11. Choosing a Reliable Garage Door Installer or Technician
The quality of professional service affects both safety and long-term performance.
Before hiring a technician, consider the following factors.
Experience and Qualifications
Look for a professional with relevant experience installing and repairing your type of door. Ask about training, licensing requirements where applicable, and insurance.
Written Estimates
Request a written estimate that identifies the problem, proposed repair, expected parts, labor charges, and warranty terms.
Parts and Warranty
Ask whether the technician uses compatible parts and whether those parts carry a warranty. Also, confirm whether the repair includes any guarantee on labor.
Safety Procedures
A reliable professional should explain the work, identify relevant risks, and test the system’s safety features after completing the repair.
Customer Feedback
Review independent customer feedback where available. Pay attention to comments about communication, workmanship, punctuality, and how the company handles problems after installation.
Comparing several qualified providers can help you select a suitable service without relying on price alone.
Conclusion
Proper installation, timely repairs, and regular maintenance help keep a garage door operating safely and reliably. By understanding your door’s construction, inspecting visible components, maintaining weather seals, and following the manufacturer’s maintenance schedule, you can identify many developing problems before they become serious.
However, safety must always come first. Homeowners can generally handle low-risk tasks such as cleaning, checking visible components, and maintaining approved weather seals. In contrast, spring adjustment, cable repair, major track work, and complex electrical servicing require qualified professionals.
Start with regular inspections, test safety features according to the manufacturer’s instructions, and arrange an annual professional tune-up where recommended. When you notice unusual noise, uneven movement, or visible mechanical damage, stop operating the system and seek appropriate assistance.
With careful maintenance and professional support, your garage door can provide dependable access, protect your belongings, and serve your household for many years.
Frequently Asked Questions (FAQs)
1. How often should I maintain my garage door?
Perform routine visual inspections twice a year, such as in spring and fall, and arrange professional servicing annually or according to the manufacturer’s recommendations. Inspect the door sooner if you notice unusual sounds, movement, or damage.
2. Can I repair a broken garage door spring myself?
No. Garage door springs store substantial mechanical energy and can cause severe injury or death if handled incorrectly. Contact a qualified technician to inspect and replace damaged springs.
3. What lubricant should I use on my garage door?
Use a lubricant specifically recommended by the manufacturer, such as an appropriate silicone-based product or white lithium grease for approved components. Avoid lubricating the tracks unless the manufacturer instructs you to do so.
4. Why does my garage door make loud noises?
Common causes include worn rollers, loose hardware, misalignment, or inadequate lubrication on approved components. Clean accessible areas and follow the maintenance instructions. If the noise persists, arrange professional inspection.
5. How much does a professional garage door repair cost?
Costs depend on the fault, replacement parts, labor, and local market rates. A broad illustrative estimate in some US-priced markets is $100 to $500 or more, but local quotes may differ substantially.
6. How can I tell if my garage door needs replacement?
Consider replacement when the door has extensive structural damage, recurring mechanical failures, poor performance, or outdated safety features that cannot be restored economically. A professional assessment can help you compare repair and replacement costs.
7. What should I do if my automatic garage door will not close?
Check for visible obstructions and gently clean the photoelectric sensor lenses. If the door still fails to close or the safety system does not work correctly, stop using automatic operation and contact a qualified technician. Never bypass the sensors.
8. Is professional garage door installation necessary?
Professional installation is strongly recommended for most complex residential systems, particularly those involving spring mechanisms, lifting cables, and automatic openers. A qualified installer can verify the measurements, balance the door, and test the safety features.
For more info visit Famefactshub