
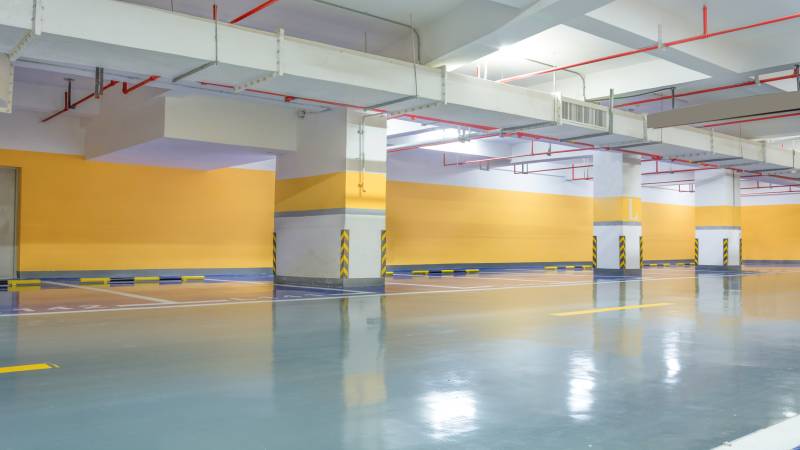
An epoxy garage floor is one of the most popular flooring solutions for homeowners who want a durable, attractive, and low-maintenance garage. Whether you use your garage as a parking space, workshop, storage area, or home gym, epoxy creates a smooth and professional-looking surface that protects concrete while improving the overall appearance of the space.
Unlike plain concrete, which absorbs stains, collects dust, and develops cracks over time, epoxy flooring creates a protective coating that resists chemicals, oil spills, moisture, and heavy vehicle traffic. As a result, many homeowners choose epoxy because it combines long-lasting performance with an impressive finish.
However, epoxy flooring is not perfect. It requires careful preparation, proper installation, and regular maintenance to achieve the best results. Additionally, several alternatives, including polyurea, polyaspartic coatings, and interlocking garage tiles, may better suit specific situations.
This complete guide explains everything you need to know about epoxy garage flooring, including its benefits, drawbacks, installation process, costs, maintenance, and alternatives.
What Is an Epoxy Garage Floor?
An epoxy garage floor is created by applying a two-part coating consisting of epoxy resin and a hardener over a prepared concrete surface. Once mixed, these components chemically react to form a hard, durable, and highly resistant surface.
Unlike ordinary floor paint, epoxy bonds directly with properly prepared concrete, creating a thick protective layer that withstands daily wear and tear.
Modern epoxy coatings are available in many finishes, including:
- Solid colors
- Decorative color flakes
- Metallic finishes
- High-gloss coatings
- Satin finishes
- Slip-resistant textures
Because of its durability and appearance, epoxy flooring is commonly used in residential garages, automotive workshops, warehouses, showrooms, and industrial facilities.
Why Homeowners Choose Epoxy Garage Flooring
Many homeowners upgrade their garage flooring because unfinished concrete creates several problems.
Concrete floors often:
- Produce excessive dust
- Absorb oil stains
- Crack over time
- Become difficult to clean
- Look dull and unfinished
Epoxy solves many of these issues by sealing the concrete and creating a non-porous protective surface.
Major benefits include:
- Better appearance
- Easier cleaning
- Increased durability
- Chemical resistance
- Moisture protection
- Improved lighting due to reflective surfaces
Advantages of an Epoxy Garage Floor
Outstanding Durability
One of epoxy’s greatest strengths is its durability.
A professionally installed epoxy floor can last between 10 and 15 years with proper care. It easily handles:
- Vehicle traffic
- Heavy equipment
- Toolboxes
- Weightlifting equipment
- Lawn equipment
- Motorcycle stands
Unlike painted concrete, epoxy does not wear away quickly.
Excellent Stain Resistance
Garages experience frequent spills.
Common substances include:
- Motor oil
- Transmission fluid
- Brake fluid
- Antifreeze
- Gasoline
- Paint
- Cleaning chemicals
Epoxy prevents these liquids from soaking into the concrete. Instead, they remain on the surface, making cleanup much easier.
Dust-Free Surface
Bare concrete constantly produces fine dust.
That dust settles on:
- Cars
- Storage shelves
- Gym equipment
- Workbenches
Epoxy seals the concrete completely, eliminating dust generation.
Easy Cleaning
Sweeping and mopping become much easier after installing epoxy flooring.
Most dirt, leaves, mud, road salt, and debris remain on the smooth surface instead of becoming trapped in porous concrete.
Attractive Appearance
Epoxy instantly transforms an ordinary garage into a clean, polished space.
Decorative flakes create texture while hiding dirt and imperfections.
Popular colors include:
- Gray
- Tan
- Blue
- Black
- White
- Granite-style blends
Moisture Protection
Although epoxy is not waterproof against moisture rising from beneath the slab, it does protect the concrete surface against spills and surface moisture.
This protection helps reduce staining and deterioration.
Disadvantages of Epoxy Garage Flooring
Despite its many advantages, epoxy has several disadvantages.
Slippery When Wet
One of the biggest complaints from homeowners is that epoxy becomes slippery after rain or when oil or water is present.
Fortunately, installers often add:
- Anti-slip additives
- Decorative flakes
- Textured topcoats
These features significantly improve traction.
Difficult Installation
Proper installation requires careful preparation.
Skipping preparation often causes:
- Bubbling
- Peeling
- Delamination
- Poor adhesion
Surface preparation usually takes longer than applying the epoxy itself.
Moisture Problems
Concrete containing excess moisture can cause epoxy failure.
Before installation, perform a simple moisture test:
Tape a plastic sheet securely onto the concrete floor and leave it in place for 24 hours.
If condensation forms beneath the plastic, your slab has moisture issues that must be corrected before applying epoxy.
Can Chip or Crack
Although epoxy is durable, it is not indestructible.
Heavy impacts from:
- Dropped tools
- Welding
- Steel equipment
- Sharp metal edges
may chip or damage the surface.
UV Discoloration
Standard epoxy may yellow or fade when exposed to direct sunlight.
Garages with large windows or doors left open frequently may experience discoloration over time.
UV-resistant topcoats can minimize this issue.
Temporary Compared to Some Alternatives
While epoxy lasts many years, it is not permanent.
Eventually, every epoxy floor requires recoating or replacement.
DIY vs Professional Installation
Many homeowners wonder whether they should install epoxy themselves or hire professionals.
DIY Installation
Typical DIY projects cost approximately $1,500, depending on garage size and materials.
Advantages:
- Lower cost
- Personal satisfaction
- Flexible schedule
Disadvantages:
- Significant labor
- Higher risk of installation mistakes
- Requires specialized preparation equipment
Most DIY installations require an entire weekend.
Professional Installation
Professional installers offer:
- Industrial-grade materials
- Proper concrete grinding
- Moisture testing
- Longer-lasting finishes
- Warranties
Although installation costs more, professional work generally lasts longer and performs better.
Step-by-Step Installation Process
Proper preparation determines the success of any epoxy installation.
Step 1: Empty the Garage
Remove:
- Vehicles
- Shelving
- Storage bins
- Workbenches
- Floor mats
An empty workspace makes preparation easier.
Step 2: Repair Cracks
Inspect the concrete carefully.
Fill:
- Cracks
- Holes
- Surface pits
- Damaged expansion joints
Allow repairs to cure completely.
Step 3: Perform a Moisture Test
Place a plastic sheet over the concrete and tape every edge.
Wait 24 hours.
If moisture appears underneath, resolve the problem before installing epoxy.
Step 4: Clean and Degrease
Remove:
- Oil
- Grease
- Paint
- Dirt
- Tire residue
Heavy-duty degreasers work best.
Any contamination prevents proper bonding.
Step 5: Etch or Grind the Concrete
Epoxy requires a rough surface to bond correctly.
Most professionals prefer mechanical grinding.
Alternatively, acid etching can create sufficient surface texture.
Never skip this step.
Step 6: Mix the Epoxy
Epoxy consists of:
- Part A (resin)
- Part B (hardener)
Once mixed, the chemical reaction begins immediately.
Most products provide only about 45 minutes of working time, known as the pot life.
Mix only what you can apply quickly.
Step 7: Apply the Base Coat
Use:
- Rollers
- Brushes
- Spiked shoes
Work methodically to maintain a consistent finish.
Step 8: Broadcast Decorative Flakes
While the epoxy remains wet, throw decorative flakes across the surface.
Benefits include:
- Better appearance
- Increased traction
- Hidden imperfections
Step 9: Apply a Clear Topcoat
After the base layer cures, apply a protective clear coat.
This final layer improves:
- Scratch resistance
- UV protection
- Gloss
- Chemical resistance
Maintenance Tips
Maintaining epoxy flooring is simple.
Follow these practices:
- Sweep weekly.
- Mop with a mild cleaner.
- Wipe oil spills immediately.
- Avoid harsh acids.
- Place pads under heavy equipment.
- Use soft wheels on tool cabinets.
- Avoid dragging sharp metal objects.
With proper care, epoxy maintains its appearance for many years.
Cost Comparison
Below is a comparison of common flooring options.
| Flooring Type | Cost Per Sq. Ft. | Average Lifespan | Maintenance | Best For |
|---|---|---|---|---|
| Epoxy Flooring | $4–$7 (standard), $7–$12 (decorative) | 10–15 years | Low | Garages, driveways, patios |
| Tile | $8–$15 | 10–20 years | Medium | Indoor/outdoor patios |
| Polished Concrete | $6–$12 | 10+ years | Medium-High | Garages, basements |
| Vinyl | $3–$5 | 5–10 years | Medium | Indoor rooms |
| Carpet | $3–$6 | 5–10 years | High | Living spaces |
| Natural Stone | $15–$30 | 20+ years | High | Luxury patios and entryways |
Alternatives to Epoxy
Although epoxy is popular, several alternatives deserve consideration.
Polyurea Coatings
Polyurea offers:
- Faster curing
- Better flexibility
- Higher impact resistance
- Better cold-weather installation
Many professionals prefer polyurea for premium garage floors.
Polyaspartic Coatings
Polyaspartic coatings provide:
- Excellent UV resistance
- Fast installation
- Better chemical resistance
- Less yellowing
Many premium installers use polyaspartic topcoats over epoxy base coats.
Interlocking Garage Tiles
Products like Motofloor and Swisstrax have become increasingly popular.
Benefits include:
- Easy installation
- Portable design
- Comfortable walking surface
- Excellent drainage
- Replaceable sections
Many homeowners appreciate their DIY-friendly installation.
Is Epoxy Worth the Cost?
Opinions vary.
Many homeowners believe epoxy is one of the best garage upgrades because it creates a cleaner, brighter, and more functional space.
It works especially well for:
- Home gyms
- Hobby workshops
- Collector cars
- Storage garages
- Automotive enthusiasts
However, some users believe the investment may not be worthwhile if the garage experiences constant welding, heavy industrial work, or excessive moisture.
Ultimately, the decision depends on how you use your garage.
Frequently Asked Questions
How long does epoxy flooring last?
Most professionally installed epoxy floors last between 10 and 15 years with proper maintenance.
Can epoxy be installed over damaged concrete?
Minor cracks can be repaired before installation, but severely damaged concrete may require resurfacing.
Does epoxy stop concrete dust?
Yes. One of epoxy’s biggest advantages is eliminating concrete dust completely.
Can hot tires damage epoxy?
Quality epoxy systems resist hot tire pickup when installed correctly on properly prepared concrete.
Is epoxy waterproof?
Epoxy resists spills and surface moisture but cannot stop groundwater moisture from beneath the concrete slab.
Can you park on epoxy immediately?
Most floors require:
- 24 hours before light foot traffic
- 48–72 hours before vehicle traffic
Always follow the manufacturer’s recommendations.
Final Thoughts
An epoxy garage floor remains one of the best investments for homeowners seeking a durable, attractive, and easy-to-maintain garage surface. It transforms dusty, stained concrete into a polished floor that withstands daily use while enhancing the appearance of the entire space.
Success depends largely on proper preparation. Moisture testing, thorough cleaning, concrete grinding or etching, and careful application are essential for achieving long-lasting results. While DIY installation can save money, professional installation often delivers superior durability and a longer service life.
Before making your decision, compare epoxy with alternatives such as polyurea, polyaspartic coatings, and interlocking garage tiles. Each option offers unique advantages depending on your budget, climate, and intended garage use.
If you want a flooring solution that combines beauty, durability, stain resistance, and easy maintenance, an epoxy garage floor continues to be one of the most reliable choices available for modern homes.
For more info visit FameFactshub